When discussing roofing choices, EPDM is a term that’s likely familiar to building managers or homeowners who have flat or low-slope roofs. However, what is an EPDM roof exactly, and why is it a common option for these kinds of roofs?
To help you out, everything you need to know about EPDM —from its benefits and composition to installation —will be covered in detail in this blog post.
What is EPDM Roofing?
Due to its outstanding resilience, lifespan, and cost-effectiveness, EPDM, or ethylene propylene diene monomer, is a synthetic rubber membrane that is commonly used in low-slope or flat roofing for both residential and commercial applications.
In order to safeguard structures from the weather and maintain structural integrity, it creates a smooth, waterproof surface. When it comes to longevity and resilience to UV rays, ozone, and severe temperatures, EPDM roofing systems exceed traditional built-up roofing systems. EPDM is also known for its flexibility and exceptional weather resistance, making it suited for a variety of climates.
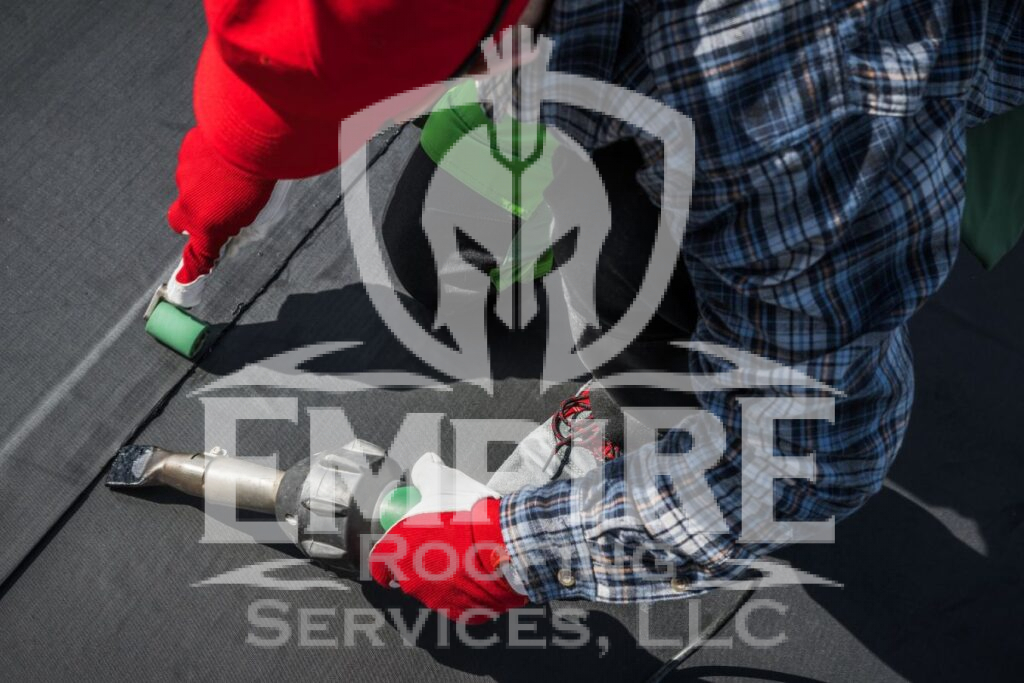
Even though EPDM sheets are reasonably simple to install and maintain, the seams need to be bonded using specific adhesives for a stable and long-lasting installation.
Also Read: 6 Common EPDM Roof Repairs (& Their Cost)
What Are The Pros And Cons Of EPDM Roofing Systems?

Though EPDM is a well-liked option amongst business owners, there are still some pros and cons that you should consider:
| PROS | CONS |
| Cost Savings: A highly budget-friendly roofing choice, often cheaper to install than TPO and PVC. Ballasted systems are the least expensive. Repairs are generally less expensive compared to other materials. | Heat Sensitivity: Can shrink, stretch, or crack under extreme heat, leading to leaks and reduced lifespan. |
| Flexibility: Flexes with temperature changes, preventing cracks and splits. | Prone to Water Pooling: Improper installation or unsealed seams can cause water pooling, leading to rot and mold. |
| Longevity: Typically lasts 20 to 30 years and is strong against wind, hail, and UV rays. | Vulnerable to Damage: Sharp objects like branches or hail can puncture or tear the membrane, causing leaks. |
| Simple Installation: Fewer seams, lightweight design, and large sheet sizes make EPDM one of the easiest roofing membranes to install. | Less Appealing Appearance: The flat, dull look might not be aesthetically pleasing. Improving the appearance adds to the cost. |
| Fire-Resistant: Slows down the spread of fire due to its fire-resistant properties. | Shrinkage Over Time: Older or poorly maintained roofs may shrink, pulling flashing away and causing surface cracks. |
| Eco-Friendly: Reflects UV rays to lower energy usage and is 100% recyclable. | Not Ideal for Hot Climates: Doesn’t perform as well in very hot environments compared to other roofing materials. |
Types of EPDM Roofing Systems
1. Fully Adhered Systems
The first option, a fully adhered EPDM system, glues the membrane directly to the roof deck, creating a strong bond. This method is ideal for roofs with high foot traffic or those prone to wind uplift, as it keeps the membrane securely attached. It helps reduce leak risks and is a reliable choice for buildings needing extra stability and weather resistance.
2. Ballasted Systems
Ballasted EPDM systems use weight, such as gravel or pavers, to hold the membrane in place. This method is effective for high-wind areas as the ballast helps anchor the membrane. Ballasted systems are also easier and more cost-effective to install. They offer UV protection and are well-suited for large, flat roofs on commercial buildings.
3. Mechanically Fastened Systems
Next, mechanically fastened EPDM systems attach the membrane to the roof deck with screws and plates. This method is versatile and provides a secure installation, making it ideal for commercial buildings where extra durability is essential. It also allows for adjustments based on the roof’s slope and design, making it suitable for various climates.
EPDM vs. Other Roofing Materials
1. EPDM vs. TPO (Thermoplastic Olefin)
EPDM is a durable black rubber roofing membrane with a lifespan of 20-30 years. It absorbs more heat than TPO, which can increase summer cooling costs. TPO is a white, reflective membrane that also lasts 20-30 years. Its heat-welded seams offer better leak protection and its reflective surface helps cut cooling costs in hot climates.
2. EPDM vs. PVC (Polyvinyl Chloride)
PVC is known for its durability, chemical resistance, and fire protection. It costs more and needs specialized installation whereas EPDM is easier and cheaper to install. While PVC handles UV rays and pollutants better, EPDM is still a popular choice due to its lower cost and simpler setup.
3. EPDM vs. Metal Roofs
Metal roofs can last 40-70 years and withstand severe weather better but are more expensive and may need extra insulation. EPDM is more budget-friendly and easier to install. Although metal roofs reflect heat better, EPDM’s flexibility and UV resistance make it a strong, cost-effective option.
4. EPDM vs. Modified Bitumen
Modified bitumen is a durable, flexible roofing system combining asphalt with modern polymers. It’s easier to repair but usually doesn’t last as long as EPDM. EPDM’s single-ply design simplifies installation and maintenance, making it a favored choice for many commercial buildings.
5. EPDM vs. Built-Up Roof (BUR)
BUR features multiple layers of asphalt and felt for strong waterproofing. It’s heavy and complex to install. EPDM is lighter, easier to apply, and often lasts longer with less upkeep. Its flexibility helps it handle temperature changes and building movement better.
Common EPDM Issues and How to Address Them
1. Punctures and Tears
Damage from foot traffic or debris can cause leaks. Fix small punctures with repair patches and adhesive. For larger tears, replace the damaged section. Limiting foot traffic can prevent damage.
2. Ponding Water
Water can collect on the roof because of poor drainage or improper slope. This can damage the membrane and cause leaks. To fix this, add more drains or tapered insulation to direct water flow. Regularly check and maintain the drainage system to prevent water buildup.
3. Weathering and Oxidation
EPDM roofs can suffer from weathering and oxidation from sun and harsh weather, which makes the material less flexible and durable. To protect the roof, apply high-quality EPDM roof coatings. Regular inspections can help catch weathering early so you can address it promptly.
4. Seam and Joint Issues
If seams and joints are not sealed well, water can get in and cause damage. Inspect seams and joints regularly to ensure they are secure. Use EPDM seam primer and adhesive to repair and reseal these areas if needed.
5. Shrinkage and Expansion
Temperature changes can cause EPDM to shrink or expand, leading to gaps. Regular inspections can catch shrinkage early. Re-secure or replace affected sections to prevent leaks.
6. Blistering and Bubbling
Blistering and bubbling occur when moisture or air gets trapped under the EPDM membrane, causing it to lift. For small blisters, make minor cuts to release trapped air and seal them with adhesive. A professional should check larger blisters to decide the best repair method.
The EPDM Roofing Installation Process
1. Prepare the Roof Deck
- Clean the Surface: Remove dust, dirt, grease, and moisture from the deck.
- Smooth Edges: Sand any sharp edges on the deck.
- Add Insulation: Install insulation if needed, following the manufacturer’s guidelines.
2. Install Drip Edge and Drip Batten
- Place Drip Batten: Install it along the roof edge to create a base for the drip edge.
- Attach Drip Edge: Fix it to guide water into the gutters.
3. Install the EPDM Membrane
- Relax the Membrane: Let it rest for 30 minutes to an hour.
- Apply Adhesive: Spread adhesive on half the deck, leaving a 6-inch border.
- Position the Membrane: Roll it back into place, smoothing out air bubbles as you go.
4. Finish the Installation
- Seal Edges: Apply adhesive and flashing around the edges.
- Seal Penetrations: Use flashing and sealant around vents or openings.
- Trim Excess: Cut off any extra EPDM.
EPDM Roofing Cost
Installing an EPDM roof costs between $13,000 and $25,000, with most installations around $17,000. This breaks down to about $3.25 to $14.75 per square foot, with an average of $4.50 to $5.50 per square foot for both materials and labor.
Breakdown of Costs
- Materials: EPDM materials generally cost $3 to $7 per square foot. Thicker membranes cost more but offer better durability.
- Labor: Professional installation usually costs $3 to $5 per square foot. Skilled contractors are important for a good installation.
- Accessories and Underlayment: Extra materials like adhesives and underlayment add to the final total. Underlayment helps protect against moisture.
- Removal of Existing Roof: Depending on the condition and complexity of the removal, removing an old roof can cost $1 to $2 per square foot.
Cost Examples by Roof Size
- Small Roof (100 – 300 sq. ft.): $400 to $2,500
- Medium Roof (300 – 1,000 sq. ft.): $2,500 to $5,000
- Large Roof (1,000+ sq. ft.): $5,000 to $35,000+
Conclusion
If you have questions about EPDM roofs or need help choosing the right roofing material, contact us at Empire Roofing & Exteriors. Our expert team provides the best EPDM services and can guide you in making the best choice for your property. A well-installed and maintained roof is essential for protecting and extending the life of your building. Reach out to us at (225) 347-8877 for professional advice and quality service.


